Liz Bakes for You: Orlandough Vegan Raised Donuts


(this post contains amazon affiliate links—which basically means I’ll link you through to the products I suggest and then if you buy them by following that link I will get a small little “thank you” commission from amazon. You can find all these at the bottom in the resources area. And, yes, Amazon is tracking how good my links do and will take back my ability to link to product and make money this way if within 180 days I’m not performing well enough. Yay!)
I attempted to be vegan in 2011 and I made it 5 days.
As with most things I figured I would go from eating everything to cold-turkey vegan and it would be cool. All or nothing! And as soon as my tongue touched meat or dairy, my journey had to end. I had FAILED and therefore must quit in shame. I think it’s safe to say that these days there are a lot more readily available vegan options and resources than a decade ago which would make any second attempt at 100% veganism a bit easier. Not to mention I have a much more reasonable outlook on my ventures these days. But I still refuse to ever eat Daiya cheese again…
It was soon after my failed attempt that one of my very best friends went vegan and she did a much better job than me. We all have a hype-girl best friend (or at least I hope you do) and Becky is mine. There is nothing quite like their hype before you do something major like idk launching a baking business. Becky was there for the before-orlandough baking business attempt and she was just as hyped for the new one.
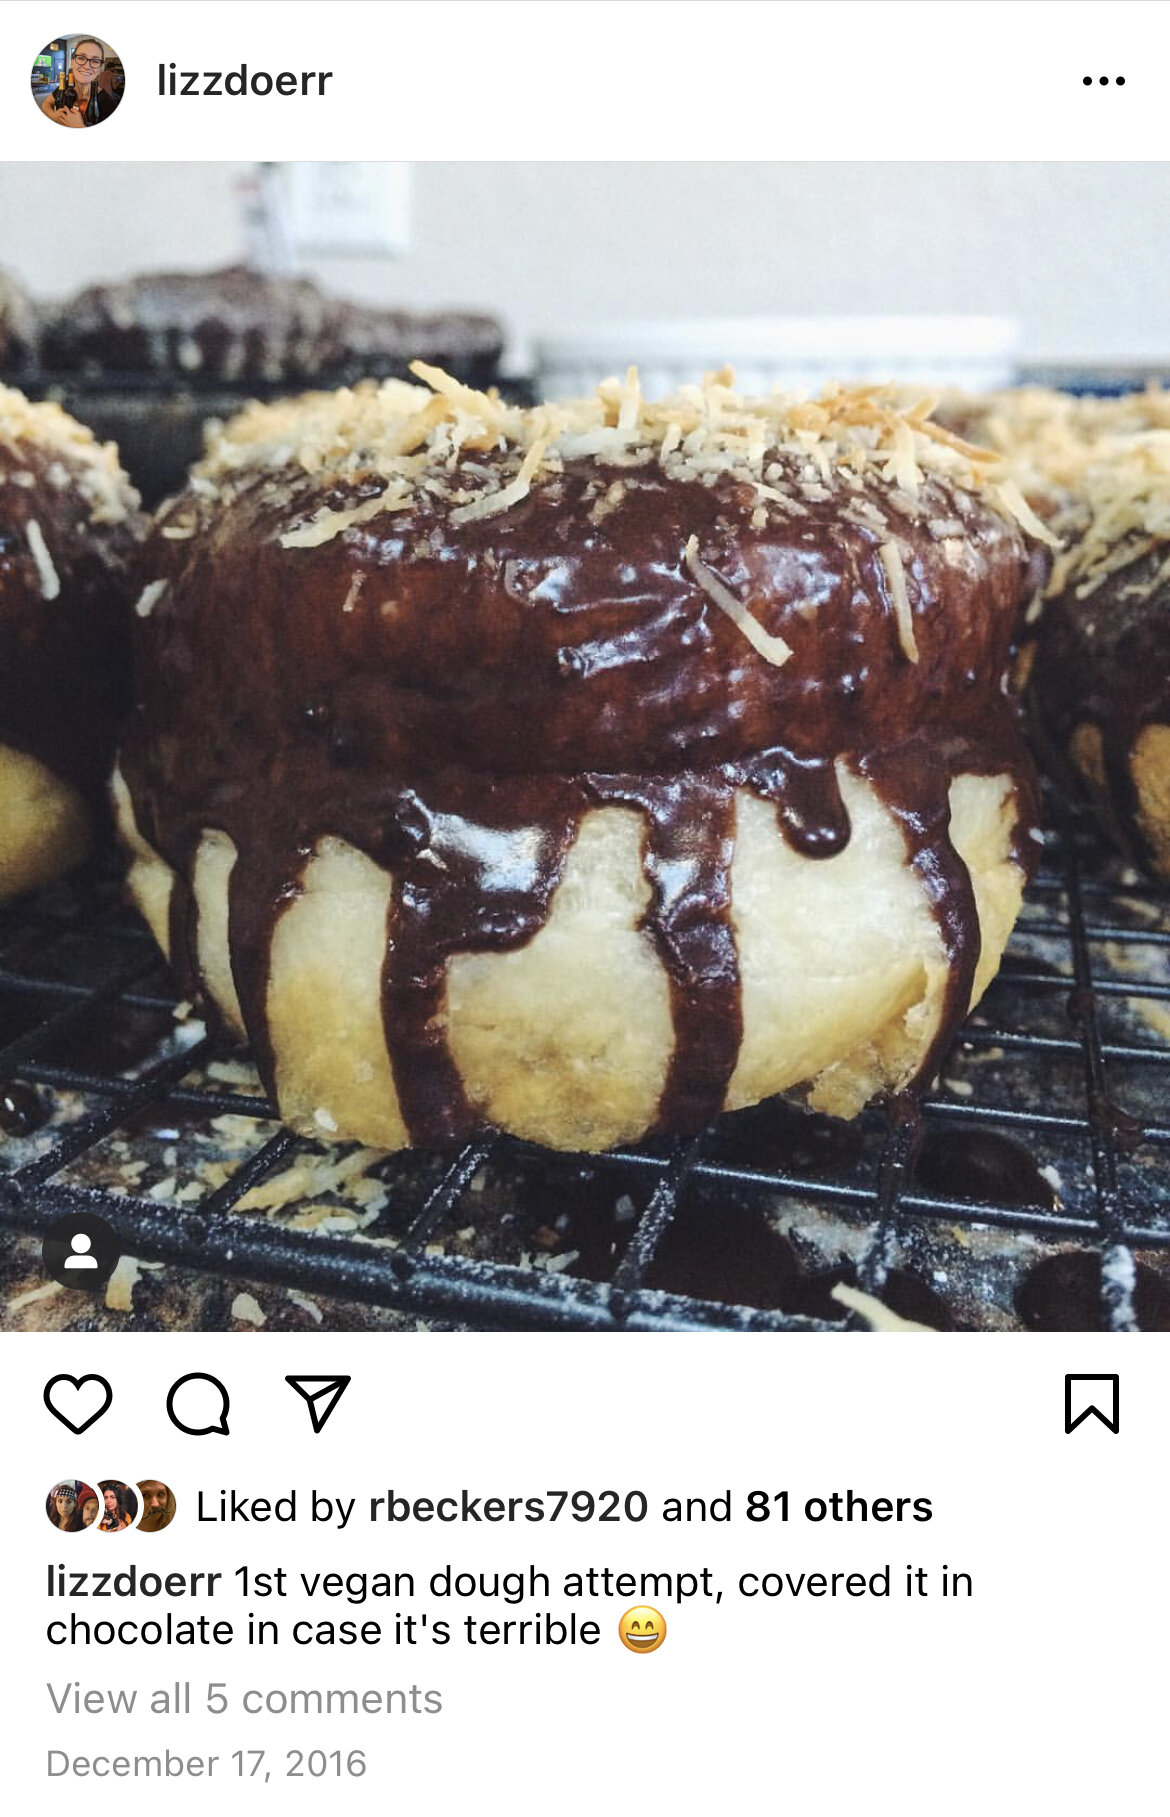
On December 17, 2016, the date of Orlandough’s first pop up, I was busy at work in the kitchen. I was making three types of donuts: vanilla glazed, chocolate old fashioned, and cheddar bacon (all full of animal products). I had told all my closest friends and family about the event and was just hoping my donut didn’t fail me and require I show up empty-handed. If someone’s entire mood can be described as a clenched butthole, that was me on December 17th (and probably the 16th too lets be honest). Then I got a text from Becky, she was so excited to come out and support me.

“….oh no. She was going to come all the way to my side of town to sit at an event where there was no food for her,” I thought. Was my solution to give her a heads up and receive her response about it being no biggie and that she was just happy to be able to make it out to be there for me? Of course not!
My solution, after a year of working to get one dough recipe to work for me, was to just find a recipe online reallyyyy quick and whip up some vegan donuts she could eat. This is probably a major reason I never again budgeted that much time for donut production before an event—too much time to rethink everything.
But Becky coming to that first pop up is reason I ever started making vegan donuts. The recipe I used was for soft pretzels that I rolled out and cut like donuts. They were weirdly okay for a one-off hope-this-works alley oop. Check the receipts:
What followed was way more requests for vegan donuts and three years of recipe development to get to the recipe I’m sharing here today. That probably sounds like a long time but mostly I was just busy and didn’t think to schedule time for recipe development. So it took on the form of “I have to make vegan donuts this weekend, I’ll try that new recipe and pray.”
You’ll find that my method for any recipe is to continue to mess with it even when it’s good because actually I need it to be perfect…not JuSt gOoD * eyeroll* I want everything I make to taste and look amazingly good (a very healthy bar to set) and not “oh it’s good for vegan…” In fact, I’d go a step further and say I want people to eat it and not even realize it’s vegan, to even be mad they couldn’t tell. “THIS ISN’T SUPPOSED TO BE GOOD! I need to use up more resources when I eat!”

And now, an artist will divulge her process: My first step when developing a vegan recipe is to start with a “regular” recipe I like. For this vegan raised recipe I used my brioche recipe and worked from there. Also, when I’m trying to make anything vegan I consider the cardinal sin of vegan desserts: “It just tastes sweet and nothing else” and think of ways to diversify my flavor profile. I’ve made a lot of changes over the years—I added and then minimized the amount of applesauce (a tip I picked up from PVDonuts), increased the salt, boosted the flavor with vanilla extract, and most recently I swapped the oil for my favorite shortening (Nutiva brand) to improve the look and shape of the donuts. And soon I’m going to add a littleeeee lactic acid and see what that does for the dough flavor.
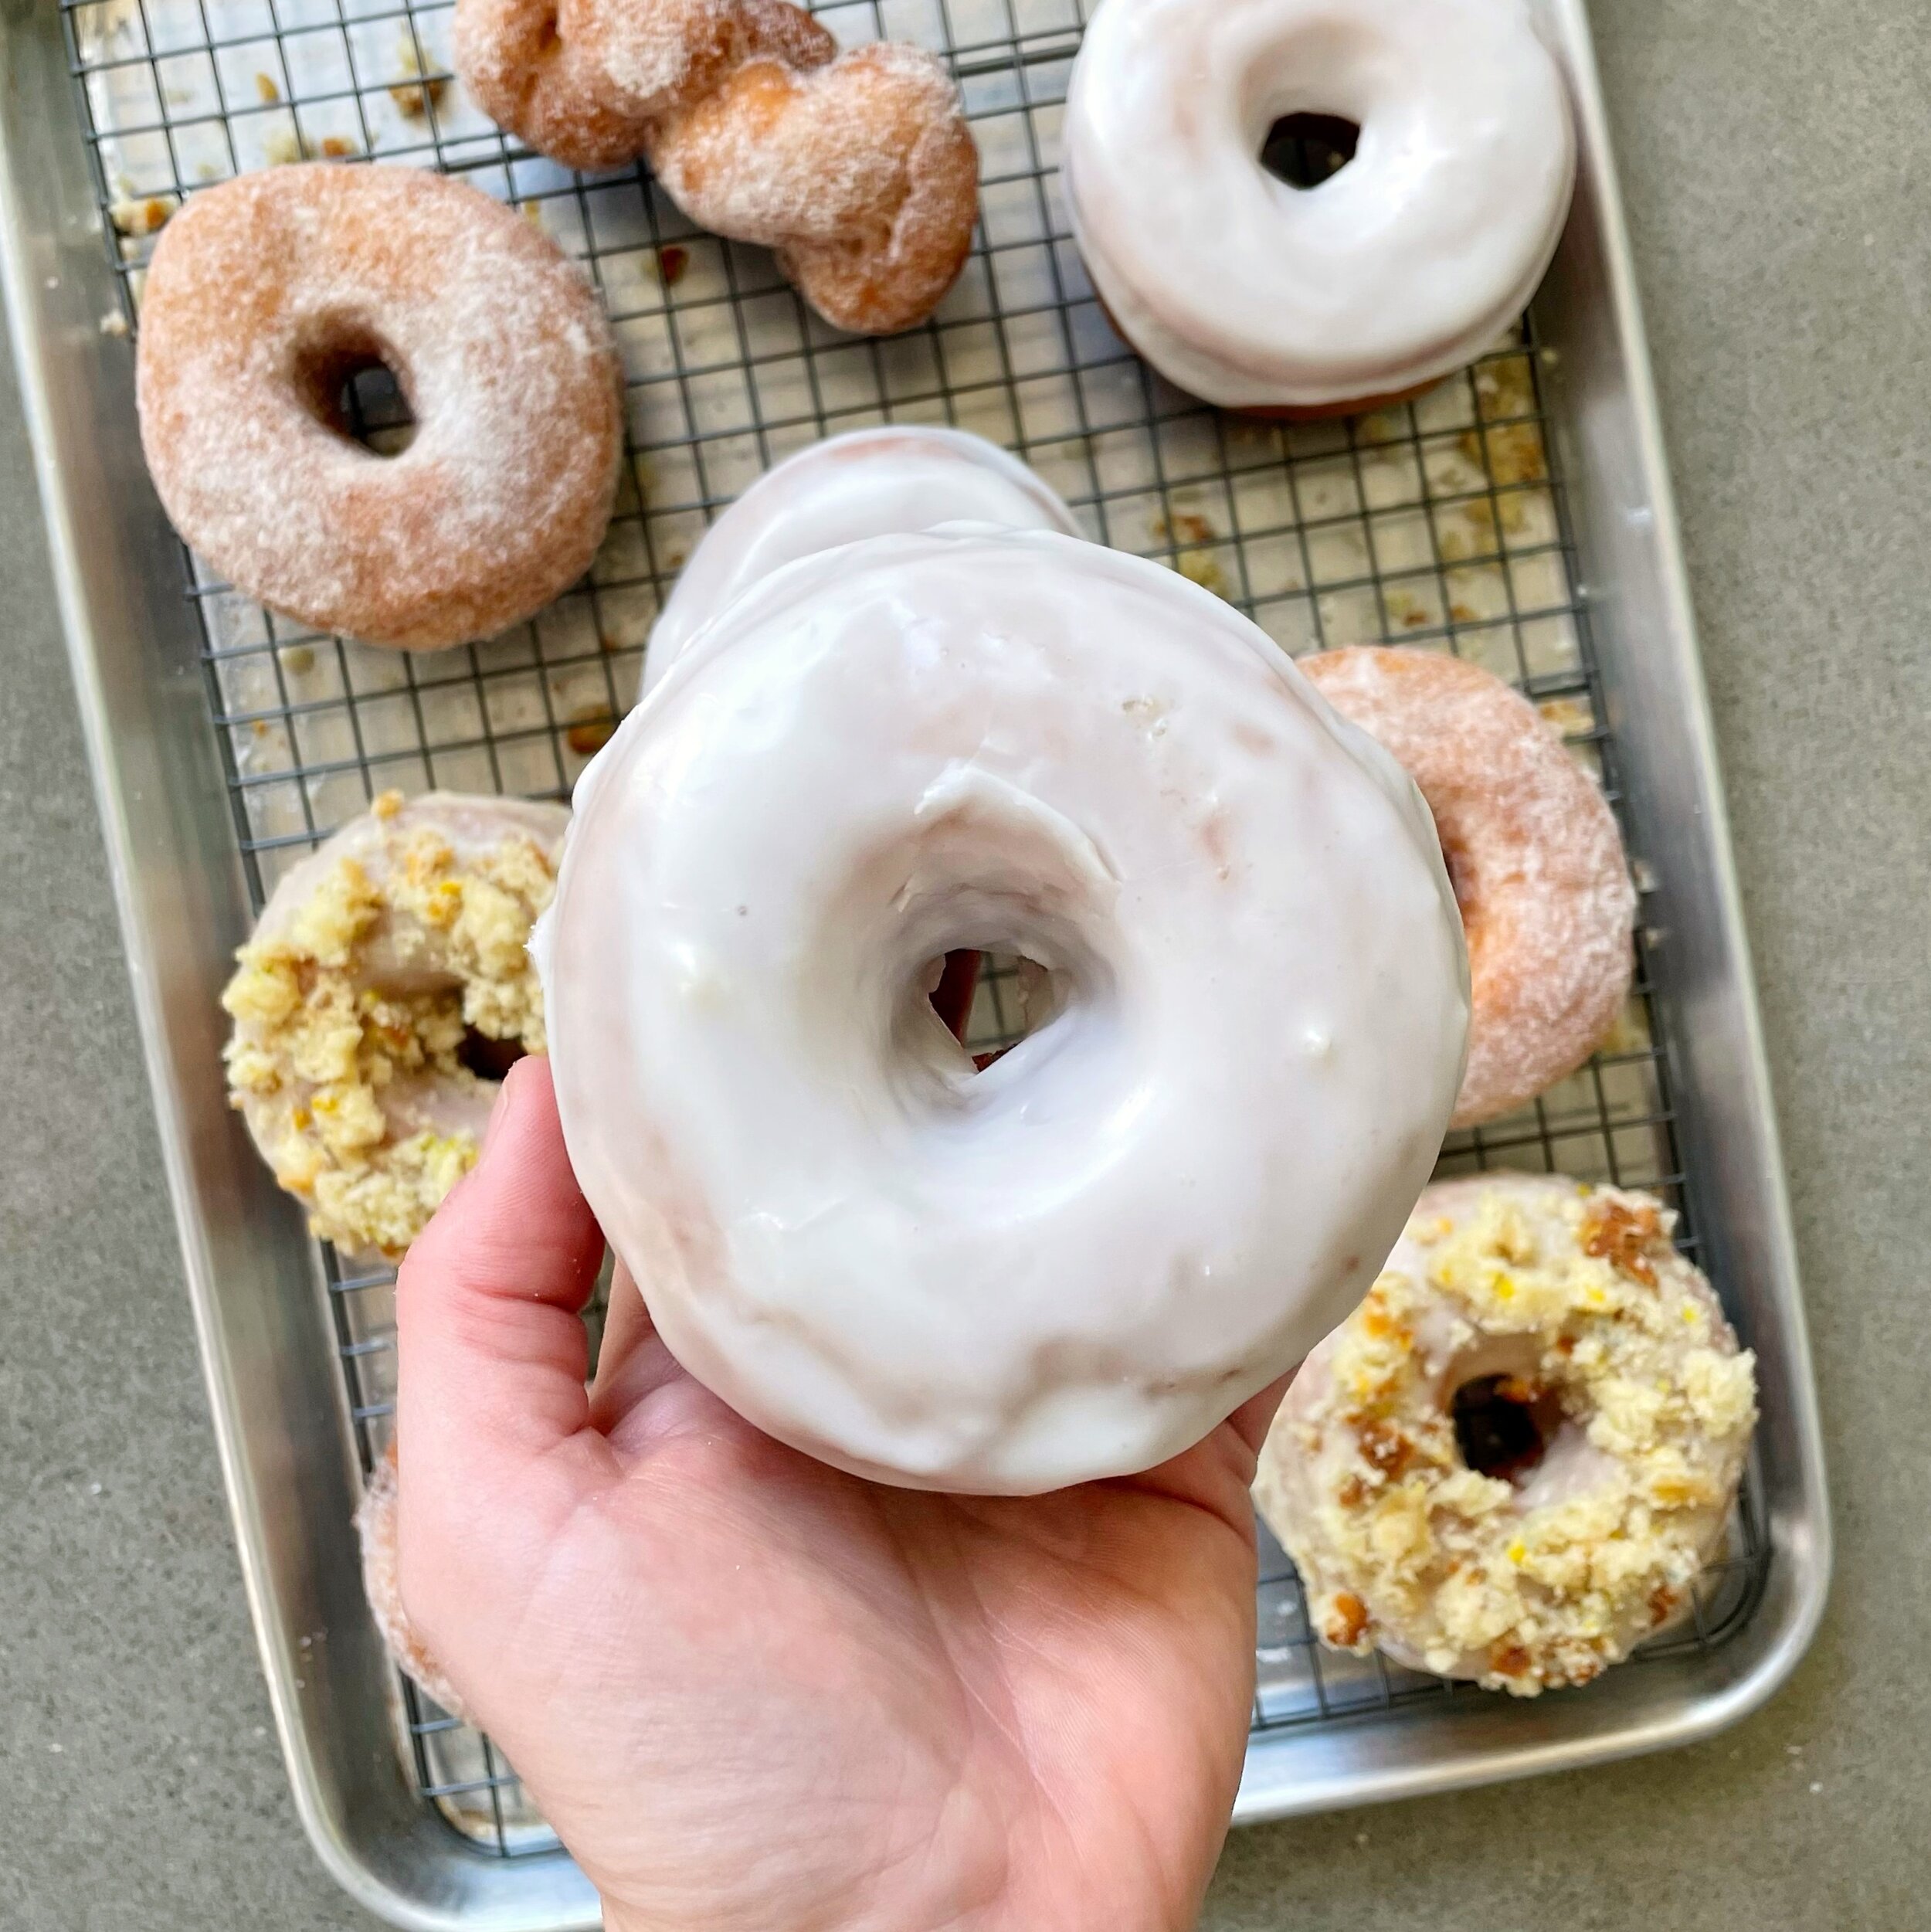
While I’ll never be done fiddling with the recipe but I LOVE this version SO MUCH. Fresh out of the fryer, this donut dipped in a bit of glaze is magical. Hours later after the donuts have cooled, I eat them as a snack undecorated. I really hope you try this recipe and you know I mean that because if by some chance you don’t like it it’ll be way worse than if you disliked, say, the Mrs. Fields poop cookies last week. This time, it’ll be personal.

Proof of how many times I messed with this recipe and also proof I had to go back AFTER I landed on a good one and try them ALL AGAIN so I could scratch out the losers because I didn’t note which was “the good recipe”
So here she is, the latest and greatest version of my Vegan Raised Donut Recipe, complete with my vanilla glaze recipe.
Vegan Raised Donuts with Vanilla Glaze
By Liz Doerr of Orlandough
Yield: 16-20 Donuts
You’ll need:
To read through this entire recipe before you start. I promise it’ll help. Watching the video should be a big help too!
Stand Mixer
Bowls for glazes/toppings
Donut Cutter standard size (I prefer this one or this set for more variety. You can find cutters locally at D&G Occasions)
Spatula
Rolling Pin
plastic wrap
bench scraper
Drying/Wire Racks (2 to 3)
Baking pans with 1.5-inch sides (3 to 4 half sheet size)
parchment paper
Chopsticks for flipping donuts
4 inch deep pan to fry in (I use cast-iron)
thermometer
Spider to get donuts out of the oil
Ingredients: I have preferences for most of these ingredients. They’re all linked at the end of the post1
810 g bread flour
75 g granulated sugar
15 g salt
10 g instant active dry yeast
it’s important that you use instant and not plain active dry yeast, they have to be added to recipes differently
110 g Shortening
384 g warm water
about 100 degrees
30 g unsweetened applesauce
10 g vanilla extract (imitation is fine)
Oil safe for frying
The amount of oil you need will depend on the size of pan you’re using. I use pure corn oil . Canola is a good option too. But check your oil’s smoke point before you purchase. You want it to be about 425-450 F just to be safe
For the glaze: Powdered sugar (750 g), room temp water (113 g), and a bit more vanilla extract
Extra Flour for dusting your work surface
Method:
Mix the dry ingredients: in the bowl of a stand mixer (this recipe was designed for a 5qt size), weigh out the flour, sugar, salt, and yeast. Stir to combine.
Mix the dough: In a microwave safe bowl, weigh out the water and warm it up a bit in the microwave (10 seconds or so, on high). Add the water to the dry ingredients in the bowl of the stand mixer along with the remaining ingredients: applesauce, vanilla extract, and shortening.
Using the dough hook attachment: Turn the mixer on low until the mixture comes together—this take a little bit so don’t fret. Then increase the speed to medium and beat for 10 minutes. If your dough starts climbing up the attachment, just turn off the mixer and knock it back down.
Do the window pane test: Grab a small piece of dough and mush it together. Gently stretch it out and hold it up to the light. If you can see light through the dough without it tearing, it’s ready to rest for it’s first rise—this means the gluten has been activated and will hold its structure during the final rise!
Rest the dough: Scrape down the sides and bring the dough into a ball in the same bowl. Cover with plastic wrap and allow it to rest for 60-90 minutes at room temperature or until it’s double in size.
(The following steps are much easier to understand—for me at least—when you see someone demonstrate them. Be sure to check out my YouTube video on this recipe for more insight!)
Roll out your dough: Once the dough has doubled in size, get your table ready to roll out the donuts. Get your rolling pin, donut cutter, a spatula, and some flour. Using the spatula, coax the dough away from the sides of the bowl and turn it out onto a clean work surface—be sure not to put too much flour down yet as excess flour will get trapped in the dough and potentially create large pockets. Start by pulling the dough up and over into the center, similar to forming sourdough loaves. Then flip it over so the part where all the pieces meet is touching the work surface—cupping your hand around the dough, gently coax it into a ball while applying pressure at the base, pushing and pulling to seal it. Rotate it, repeating the cupping technique, and work to tuck the dough it under itself until it comes together into a ball. Once you believe it’s together, check the bottom and make sure the dough has sealed back together. If it hasn’t after a bit of working it, you can always pinch it back together.
Cut out your donuts: Using the dough scraper if needed, pick up your dough and liberally flour the work surface. Place the dough back on the work surface, dust the top with some flour, and roll it out to about 3/4 to an inch thick (if you’re making mini donuts, roll it out to half that thickness). Be sure to pop any large bubbles (most will pop on their own as you’re rolling out the dough but if any are left, pinch them and bring the dough back together. Don’t worry about small bubbles). This dough is springy so as you’re rolling be sure to pick up the dough to make sure it isn’t sticking anywhere on the counter. If it is, it may spring back and misshape the donuts. Keeping it loose from the work surface and moving it around will ensure it’s truly rolled out to the thickness you need. Using your donut cutter and starting close to the edge, begin punching out donuts, keeping each cut as close to the previous as you can without overlapping—you want to get as many donuts as you can out of this first roll-out.
Roll out your dough again: Once you’re unable to punch out any more donuts, swipe any excess flour off the work surface and bring all the dough scraps back together into a ball using the hand-cupping method previously outlined. Once it is back together, roll it out to 3/4 inch thick. Keep in mind this second roll out is more compact than the first. These donuts may take a bit longer to rise than the first ones and they could be bigger than the first ones. Once the dough is rolled to the correct thickness, check for any large holes and then begin cutting out donuts. At this point, there shouldn’t be too much dough left. I like to make twists with the remaining dough but you can also bring it back into a ball and cut out another donuts or two if you prefer.
Rise your donuts: Grab one of your pans (a half sheet pan with a plastic lid is ideal, my favorites are linked below). Line the bottom of the pan with parchment paper and dust it liberally with flour. Place your donuts on your prepared pan and either cover with the plastic lid or with plastic wrap to trap in moisture during the rising process (donuts need humidity to rise properly). Don’t overcrowd the pan—the safest bet would be to aim for 6 donuts per pan. Repeat until all donuts are on pans and covered.
Check your donuts rise: Allow the donuts to rise in these pans for 60-90 minutes at room temperature. Don’t be too concerned about the time it takes, but instead be sure to check for visual cues that they’re ready to be fried. When you press gently on the donut, does it spring back quickly and all the way or slowly with a small indent remaining? If it’s the latter (slow and small indent), they’re ready to be fried. When you gently shake the pan, do the donuts jiggle? If they do, they’re ready to be fried. Be sure to re-cover them until the oil it hot.
Properly risen donuts are the key to beautiful donuts. It gets easier to judge the more you make them. If you under-prove your donuts (don’t allow them to rise enough), they generally have a tight crumb structure and may have a hard time cooking through. If you over-prove your donuts (allow them to rise too long) they can take on too much air and become unstable, typically resulting in the donut collapsing. The latter was a big issue for me for a very long time. Vegan donuts always seem to take longer to rise than my regular donuts so be patient with them.
Prepare your oil: turn on the vent fan above your stove top. Remember if you have any issue with the grease (like a fire) to smother it, don’t try to put it out with water. Grab your frying pan (my favorite is linked below), whether it’s a cast iron or a big stock pot. You will need about 2 inches-deep of oil in whatever pan you choose and it should be as wide as your burner can accommodate so you can fry more than one donut at a time. I prefer the cast iron pan listed below because it’s not too deep (like a stock pot, which I use in the video because it’s what I had). It’s therefore easier to get my chopsticks in to flip donuts in the more shallow pan. Add 2 inches of oil to your pan and turn the burner to high. Set a timer for 5 minutes to check the temp once it goes off but also be mindful of how powerful your burner is—it could heat the oil faster than this. Mine usually take 7-10 minutes. Once your oil reaches 325 F, turn the burner to just below medium heat to maintain the temp. It will continue to rise to 350-375 F as you grab your donuts (which is the range we want to be in).
Prepare the pan for finished donuts: place a drying rack inside one of your baking pans. This will be where you put the donuts when they’re done so the oil drains off. You will also use it for decorating. Position this pan right near the pan your frying in. You can also simply line a drying rack with paper towels to catch the oil if you don’t have a pan available. The pan is handy for when you start decorating though as it catches all the glazes and toppings that run off the donuts and helps make clean-up easier.
Fry your donuts: Double-check your oil temp—make sure it’s between 350-385 F, if it’s not hot enough, wait. If it’s too hot, turn off the burner and wait for it to cool to the temp zone—this is annoying but you just did so much work to get your donuts ready and a too-high temp can ruin them. Yes, a slightly higher temp right at the beginning of frying (slightly higher than 375) is fine, the oil temp will drop once you add the first donuts. Grab your first pan of donuts and bring it as close to the oil as you can. You can either grab donuts with you fingers OR cut around the parchment paper under each donut and lift it using the paper. I use my fingers but watch out for the oil in all regards, it’s hot! Gently handle the donuts. If you’re using your fingers, use both hands to grab the donut, tilt half of the donut in the oil and drop the remaining half to protect your fingers. If you’re using the parchment method, grab the parchment with both hand and lift it to near the oil, tilt the parchment and ideally the donut will slide off into the oil. If it doesn’t, try flipping the parchment over and the donut should drop in but be careful of any back-splash of oil. Don’t overcrowd the pan—generally it will fit 3-4 donuts at a time, you want them to have room to move around a bit. Fry the donuts for one minute on the first side (set a timer). Once the minute is done, grab one chop stick in each hand. Using your dominant hand, get one chopstick under one side of the donut and flip the donut—push up from the underneath side and use the other chopstick to help if needed to steady the donut. If the chopsticks aren’t your cup of tea, try a silicon spatula or spider to go under the donut and flip it like a burger patty. Again, be careful with the oil here, there can be some back splash and this can be where a taller sided pan comes in handy actually. Fry the donuts for one minute on the opposite side.
Remove your donuts from the oil: Using your spider, lift your finished donuts out of the oil and place them on the drying rack. Repeat the frying process with the remaining donuts. Note: Twists should be fried for the same amount of time if you’ve made those and mini donuts require half the time frying.
While your donuts cool off, make your vanilla glaze: Weight out 750 g powdered sugar, 113 g room temperature water, and 8 g vanilla extract. Room temperature water is important here—if you use hot water, the glaze will crust quickly as the water cools and then when you go to dunk your donut the crust will prevent the donut from grabbing much glaze. Cold water is probably fine too but I prefer room temp. Whisk until smooth. This should glaze all your donuts (I hope). It will be quite thick. If you want to thin it out don’t add more than 10 g more water otherwise it may be too thin and make the donuts soggy instead of resting on top.
Glaze your donuts: Once your donuts are cool, use one of two methods to glaze them. You can dip them (which I prefer) or you can spoon the glaze on. Which side should you glaze? I prefer to glaze the side that was facing up during the rising process. It will be more rounded than the underside which is flat. Though I know of plenty of donut shops that glaze the underneath side too so it’s up to you! If you’re dipping them: dunk the donut into the glaze until it’s about halfway deep in glaze (use the proving line if you have one on the donut as a point of reference for how deep to dip). Keeping it in the glaze, jiggle it around a bit. Continuing the jiggling movement, gently begin to pull the donut out of the glaze until it’s free of it, then flip the donut over and place it back on the drying rack to harden up a bit. Repeat with the remaining donuts. If you’re spooning the glaze on, be sure to put a few little dollops on top the donut all around, then drag the back of the spoon around to coax the glaze around the whole donut.
Proving line: this is the light line that results after a donut it fried. It is generally present on a well risen donut but not always. It can go around the entire donut or be present in some areas. It is the result of the donut floating slightly above halfway in the oil due to its rise. If you don’t have one, don’t fret. Sometimes I get them and sometimes I don’t. Rolling donuts out by hand create a lot more variation than you’d think so all your donuts will have their own personality.
Eat all the donuts!!!! (not including that one your snuck right after it got done frying…)
More notes from one donut maker to the next:
I’ve been making donuts for many, many years at my house. I did my best to be sure to include as much detail about the process as possible to help you if you plan to try this out at home.
One thing I will note is that I had a prolonged issue with over-proving my raised donuts for the first year I was making them (Thanks, Florida). I generally would follow what the recipe wrote and found that my donuts would fall flat (a sign that they were left to rise for too long and the gluten structures inside the donuts had become unstable). The best way to avoid this is to check for visual cues and TRUST them.
Another major issue I’ve run into with frying is having the wrong oil temperature—too low and your donuts might expand out and get oil-logged. Too high and they can seize up immediately and not get the second burst of rising they need once they begin to cook and therefore be dense. The best temperature to fry at is being 350-375 F in my experience. This can be tricky to maintain at home on a stove-top but do your best. Temp your oil between batches of donuts to make sure you’re in the zone.
Mostly, I’d say be patient with yourself when it comes to raised donuts. They will probably still taste really good even if you “mess them up.” It can take some time to get the timing of everything right. You can always do what I did and focus on frying up old fashioned donuts before you take on raised donuts (the easier of the two style in my opinion). This boosted my confidence to try raised donuts even after many batches fell completely flat.
Lastly, I will say don’t let my recipe hold you back as far as decorations goes. Use my Orlandough instagram account for inspiration or head to Pinterest. Mix flavor powders like nesquik milk powder or matcha into the vanilla glaze. Add toppings like crushed cookies, candy, a ring of buttercream, or nuts. Try your hand at rolling the donuts in cinnamon sugar. This dough recipe, once mastered, can be made into filled donuts, cinnamon rolls, a pan loaf of sandwich bread, or any flavor donut you can dream up.
Resources: Links to my preferred items!
Ingredients
King Arthur Bread Flour (full disclosure this is DEFINITELY cheaper at Publix unless you want to get multiple bags)
Instant Yeast (big bag, be sure to keep it refrigerated after you open it!)
Pink Himalayan Salt (I know people prefer kosher but this is what I’m used to and what I’ve tested this recipe with. Keep in mind some salts are saltier than others—sounds weird, doesn’t it?)
McCormick Imitation Vanilla Extract
Kitchen Tools
Kitchen Scale (this one is well reviewed on Amazon. But similar to the one I use it requires AAA batteries and honestly I hate having to change them out, it’s a process... There are rechargeable ones as well if that’s your preference)
Thermometer (this is the one I use, but this one is also preferred by a lot of cooks)
Ateco Standard and Mini Donut Cutters (a set with both options in case you want to mix it up!)
Ateco Cutter Set (create a range of sizes with this one! Keep in mind the cutter in this set you should use from the center-hole of the donut is the second-from smallest one, not the smallest, for a regular sized donut—the smallest one will be too small for a regular sized donut)
Bench Scraper (this one has inch measurements on it which are great for donut letters (class coming soon!))
Bowl Scraper (set of two) (two seems like too many but these work so much better than spatulas for getting dough out of bowls and you might just get addicted to using them and need both…)
Lodge Cast Iron Pan with LID (love a lid, helps speed up the oil heating imo—not backed by any evidence just me thinking it—and also nice to have so once you’re done frying you can cover it up and curb the oil smell a bit)
Rising Pan Options: similar to what I use here (set of two) and exact ones I use here but not an affiliate link
Cooling Pans and Racks (set of two, perfect for this batch and other cooling and glazing needs!)